Hey All,
Whew – Maple and myself are in full preparation for summer! Last weekend was incredibly busy – we hived two colonies of bees, got the last pick-up of our birds (both meat and new layer chicks), and put siding on two walls of our house (only two more to go!). In our spare (ha!) time, I also talked Maple into working on a project I had gotten obsessed with thanks to Pinterest.
I love play kitchens for children. LOVE them. Especially since Maple loves cooking so much, I just get all gooey thinking about Maple cooking in the kitchen and Luisa helping him by cooking alongside in her little kitchen.
I looked online to kind of get an idea of cost. There are some amazing kitchens available for sale if you have the money to spend. This kitchen by Melissa & Doug is absolutely adorable. My neighbors have this kitchen by Hape and all the kids love playing with it (and how cute is the color scheme?)
Maple and myself are on the tightest string of a budget in order to finance siding, new flooring and dirt work this summer (plus we’re still financially rebounding from me being part-time for almost a year) so spending over $100.00 on a large toy for Baby GHM isn’t really an option right now.
Luckily there’s this thing called Pinterest. I looked up “DIY Play Kitchens” and found a treasure trove of images and ideas. There were also detailed instructions on how to convert either an entertainment center or a small dresser/nightstand into a little play kitchen for your small ones.
I collected a bunch of images of play kitchens that I liked.


Then I put the word out on Facebook, I was looking for a dresser/nightstand that someone was getting rid of (I offered eggs in trade). Within an hour I had a response, my friend Cat was getting rid of a nightstand that had been outside for a bit. When I got it home I took a moment to survey. The exterior was in pretty rough shape, but the size was perfect.


Step #1 was to clean the dresser. I vacuumed out the inside and scrubbed the tops and sides with bleach water. I then let it dry overnight.
Step #2 was to paint the outside. I looked at our stores of paint in the back shelves (we keep all the extra paint from our building/painting projects) looking for something bright and playful (I figured I would find something, Maple and I tend to gravitate towards paint that begins with the descriptor “Neon”). Behind a bunch of black and white paint I found an unopened can of Aqua spray paint which was exactly what I wanted. I took the dresser outside and, over the course of the afternoon put three layers of paint on the top, front and sides.


Next step was to begin working on the top. I had bought four wooden circles ($0.99/each) from Michael’s to act as burners. (I figured it was worth $0.99 to not spend two hours trying to cut circles out with a jigsaw.) I laid out my burners with my sink set.
The sink set was comprised of the most amazing faucet handle ever that I found at the Transfer Site. I’ve held on to it for three years, knowing that I would use it at some point, even if it was just for quirky decoration. The ‘sink’ was one of dog bowls that I hijacked for this project.
I laid out everything until I was sure that it would all fit and look halfway decent.

Step #3 was cutting out the sink hole with a jigsaw and the two holes for the faucet with a drill. This did result in some scuffing happening next to the sink (you can see it in the picture below). I was out of spray paint (it had taken the whole can to do the main body) and I didn’t want to buy more. This was a moment where, if I was giving the play kitchen as a gift I probably would have attempted to cover it up. Since this treat was for my own little Ms. Mayhem my attitude was a bit more, “Meh, she’s going to draw all over this anyway.”)

Step #4 was to attach the faucet with two washers on the underside. We didn’t have the right size so we had to go buy these (two plastic washer for $1.39 total). The sink went in easy-peasy perfect and looked phenomenal.

I had to get a couple close-up shots of the handle because it looked so perfect. Please note also the cute scripty “C” and “H” on the knobs.


So while all this Aqua spray paint had been drying outside I had been inside painting the door, backsplash and side shelf all orange. All these add-on parts for the kitchen (door, shelf, back) came from different pieces of scrap wood we had around. I painted each of these three coats as well so that the different grains/types of wood would be hidden and it would look more uniform.
Step #5 was attaching the back. Originally I had wanted a peg board backing (to hang wee pots and pans on) but I was limited due to the height restrictions in our tiny kitchen. There was only one spot the play kitchen could go – and with the 22″ height of the dresser, along with the 1″ wheels we were going to put on it, that only left room for an 8″ peg board, which wasn’t really worth the price of buying a peg board. So we just cut this piece for the back. (Version 2.0 of this play kitchen is going to be when I add wooden oven knobs to the back – I found a good DIY I want to try for that down the road.)

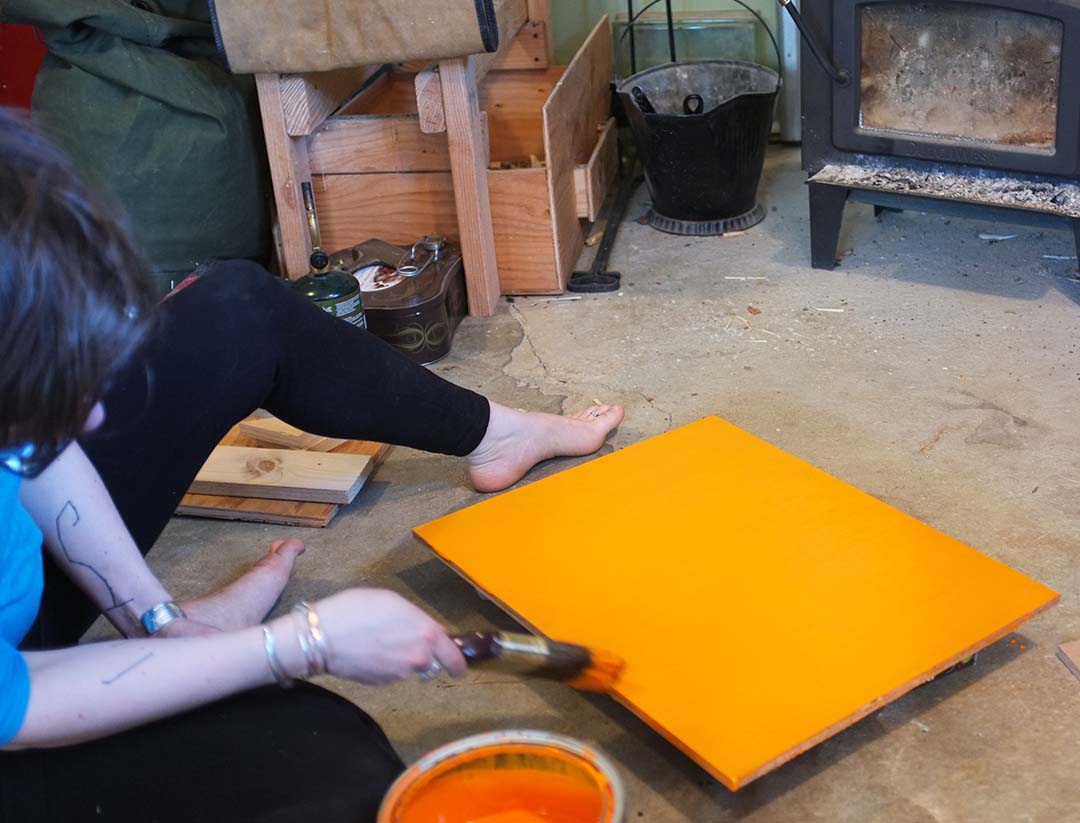
Maple took this dynamic action shot of me painting.

Step #6 was finishing the door. I found one DIY that had used chalkboard paint on their door so their kids could draw on it and I really liked that idea. I had some chalkboard paint kicking around from another project so after my three coats of orange paint dried on the door I did two layers of chalkboard paint (I used painters tape to make sure I got a nice square shape).
Step #7 was adding wheels and attaching the door. We hijacked the wheels on a cart that we were no longer using and then used a spare pair of hinges that we had left over from when Maple built some baby-proof doors for the cleaning supplies.


Step #8 was painting and then gluing down the burners. The burners were the part of the project I struggled with the most. I had read all these DIYs about how to build raised wood burner, how to use contact paper and a compass to make sure your circles were perfect etc. My main thought reading all those instructions was like, “Geez, how hard could it be just to draw some circles on wood?” As it turns out, it’s pretty hard. I did cut out circles of paper, traced them on the burners with a pen and then attempted to paint over the circles. As you can see from my burners, free handed painting is not really my skill set.
I used black paint that we had around for the initial base of the burner. Once that layer dried I painted my circles on with orange. Looking at the finalized product I kind of wish I had just left the burners straight black. Once I got the burners actually on the stove they looked pretty cute but I’m still on the fence. I’ll probably do something different with them when I put knobs on the back.


Step #9 was attaching the side shelf. This was done with another spare pair of hinges (I have never been so happy that we have so many spare hinges kicking around the house).

And then we were done! I hung some handmade lace I found at the Transfer Site as a dish towel on the front of the door and put it in the kitchen.


All total we spent $3.96 on the wooden burners and $1.39 on the washers for a grand total of…$5.35.
I’m excited to add a couple upgrades (burners, little kick-stand for the side shelf so it can stand on its’ own, and oven knobs to the back shelf.
The longest part of this project was definitely waiting for all the different coats of paint to dry (which took probably 4-5 hours) but the actual nuts and bolts of cutting shelves, installing the sink and door, attaching wheels etc. only took 1-2 hours.
All together the colors really worked (a happy accident) and I can’t wait to watch Baby GHM play with this endlessly for the next several years!
Cheers and Love,
Maple and Me
